Showing posts with label How to. Show all posts

Saturday, July 19, 2025

How to make scale palm tree.. (by Kerem Özkır)


Hello, 

I'm sharing my technique for making palm trees for 1/72 scale dioramas and vignettes. I hope you find it useful. 

Happy modeling, 

Kerem...


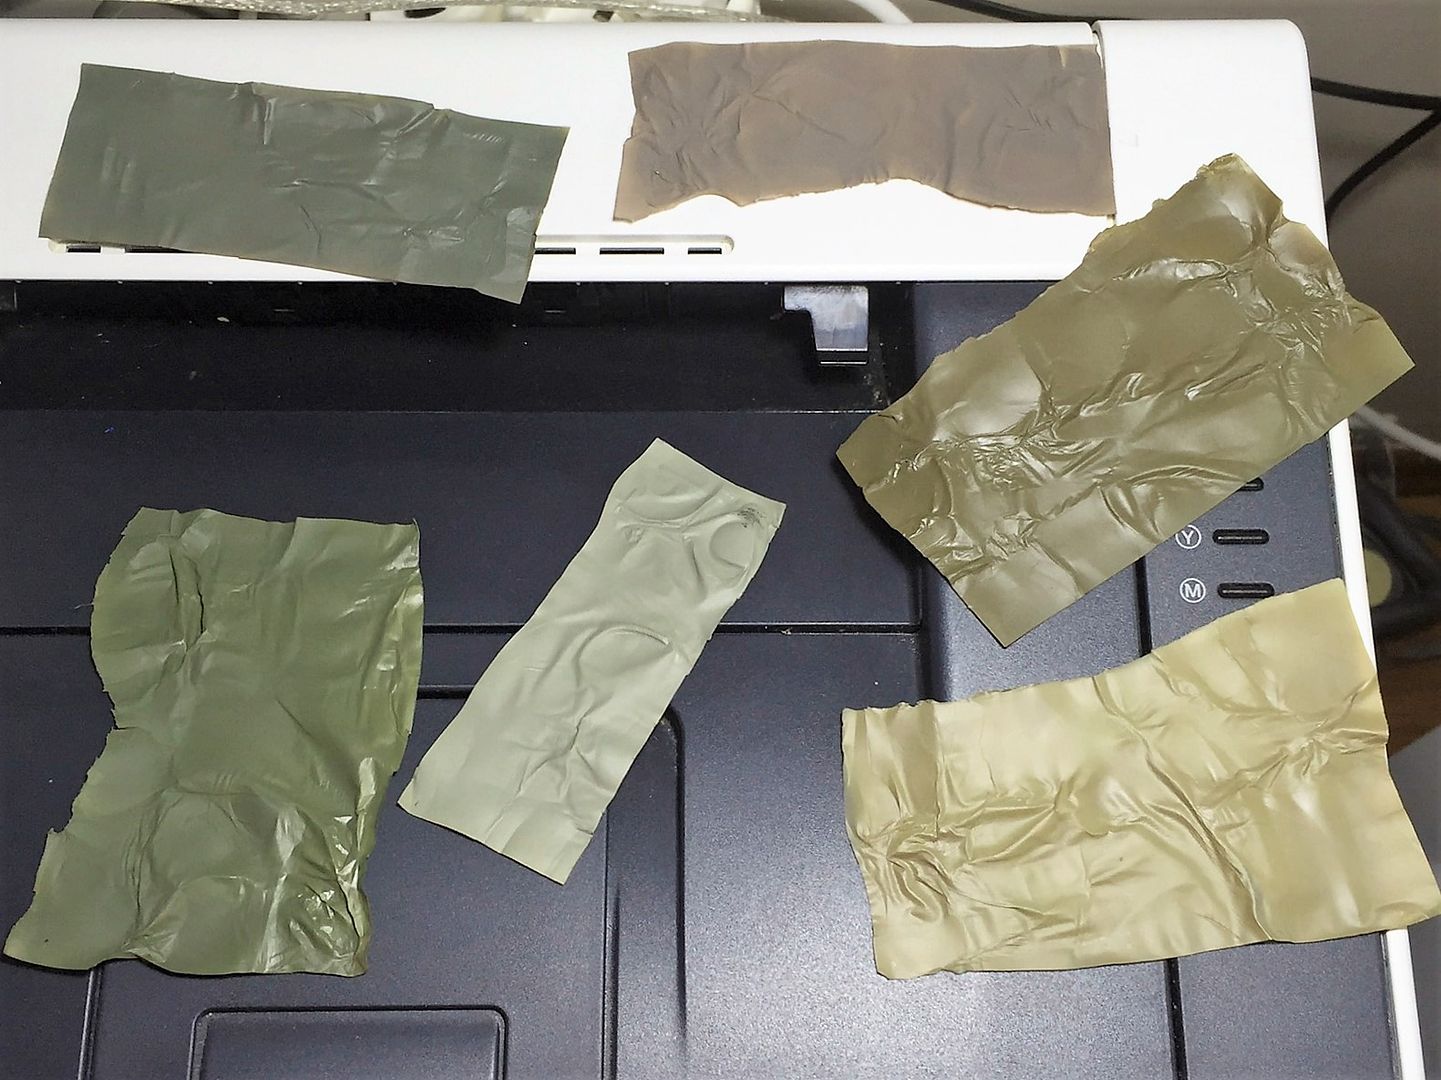
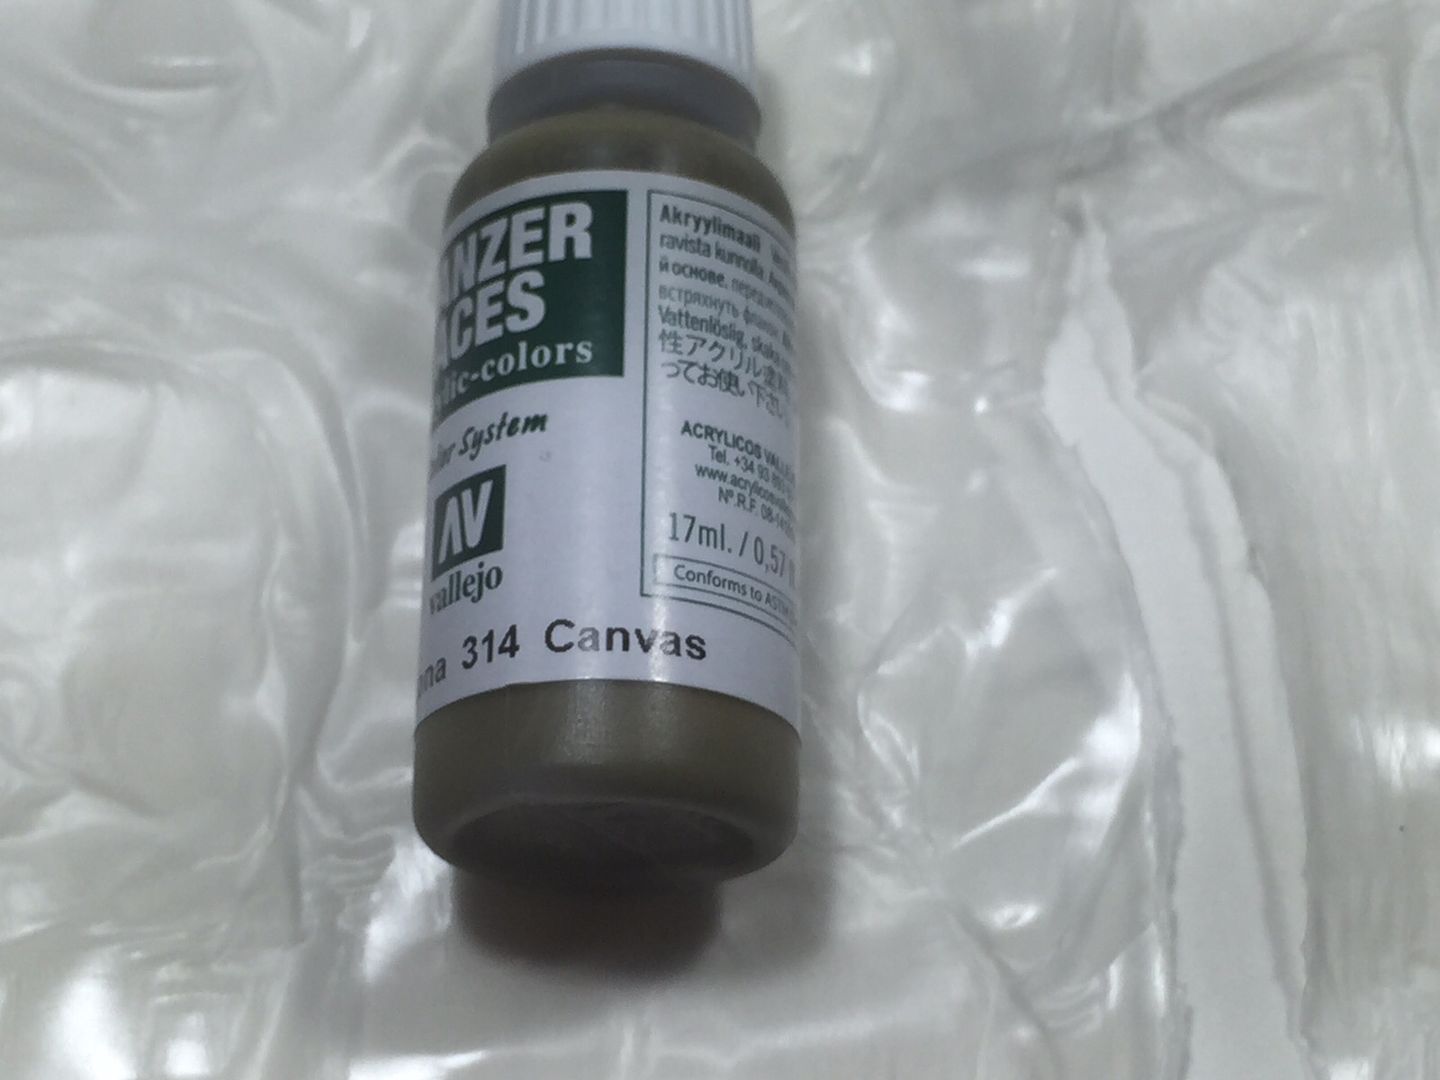
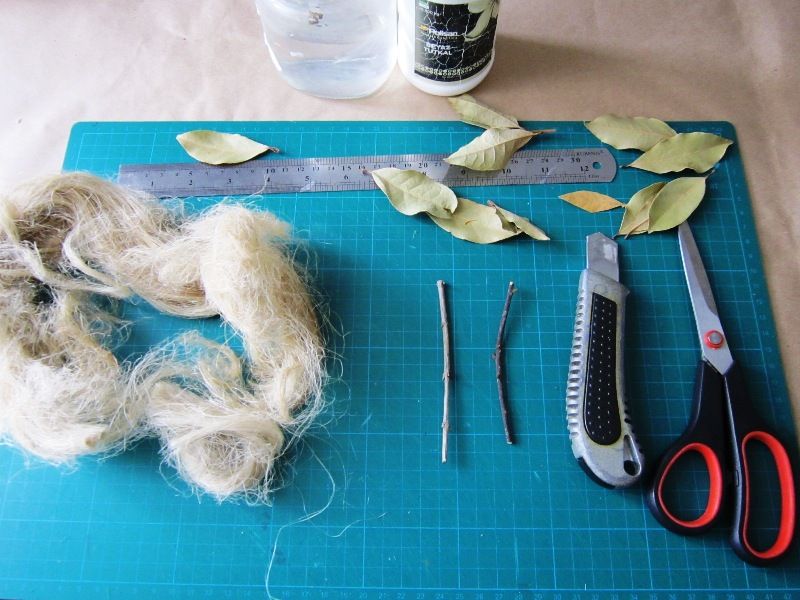
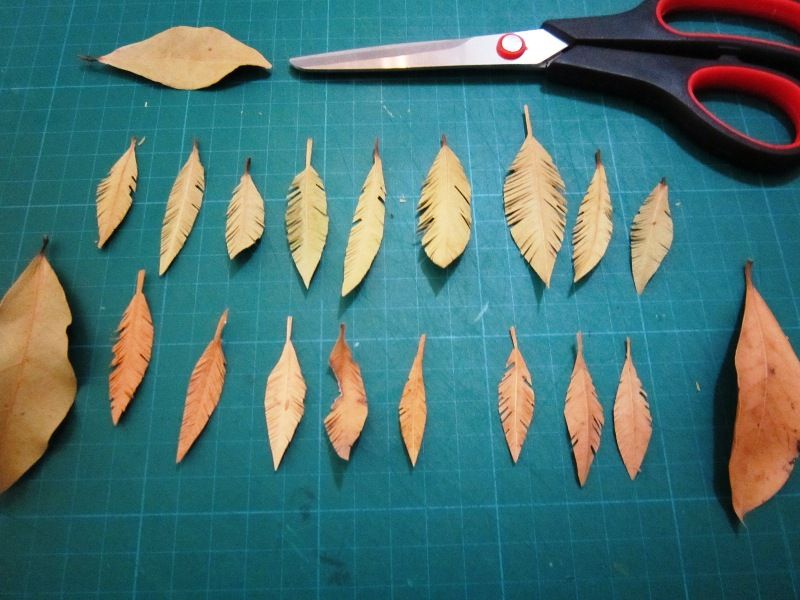
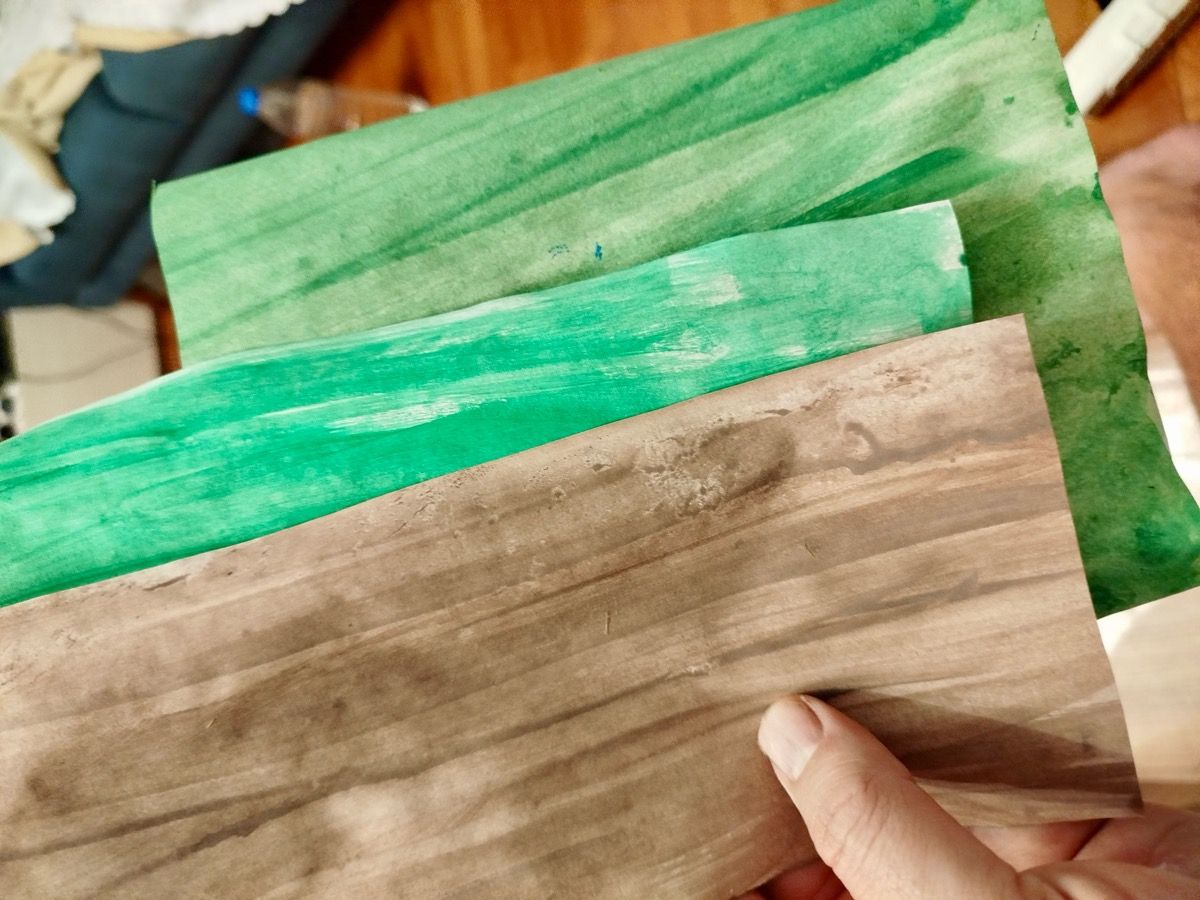
At first i painted both sides of standart copy paper with green and brown acrylic paint.


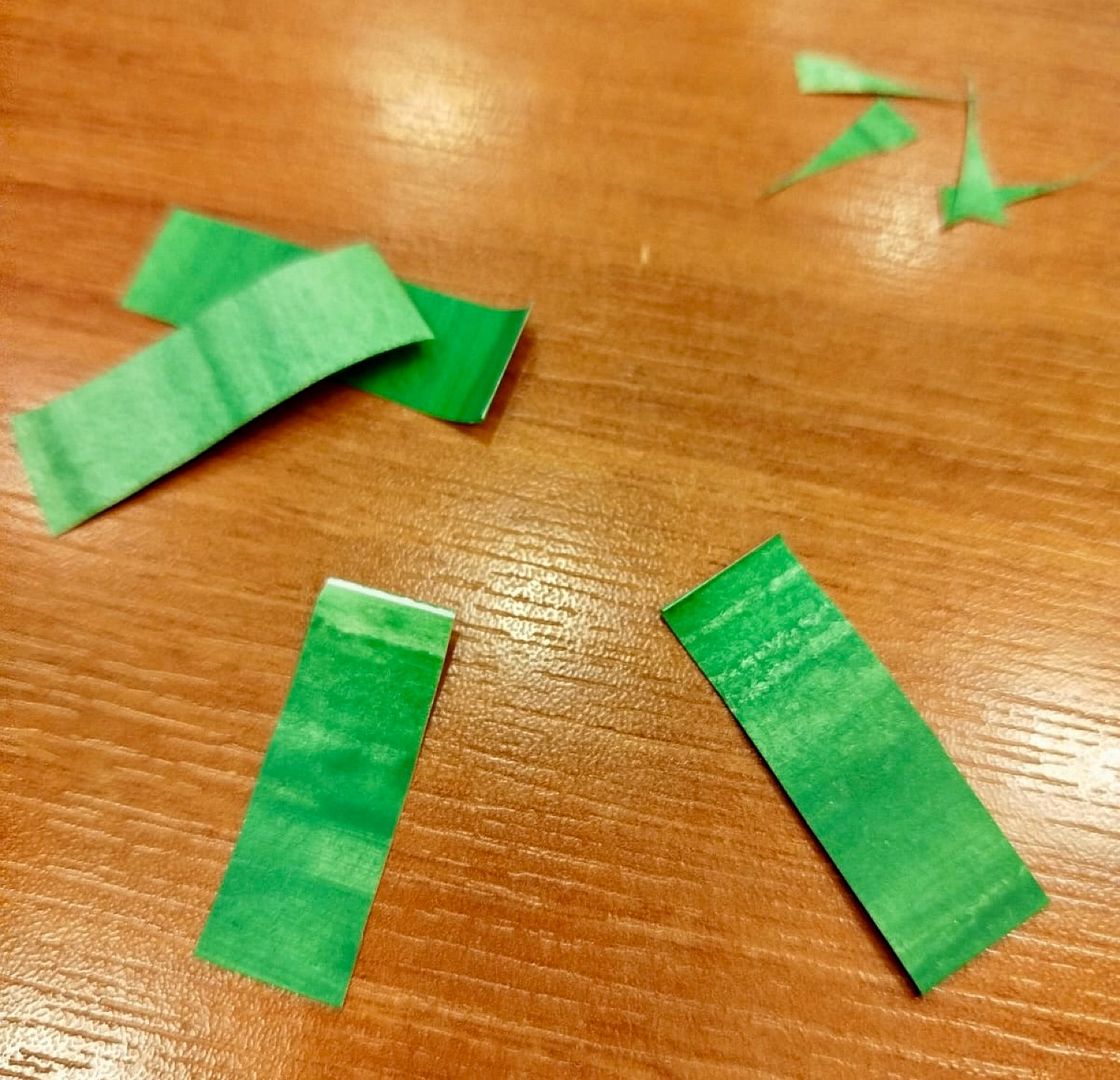
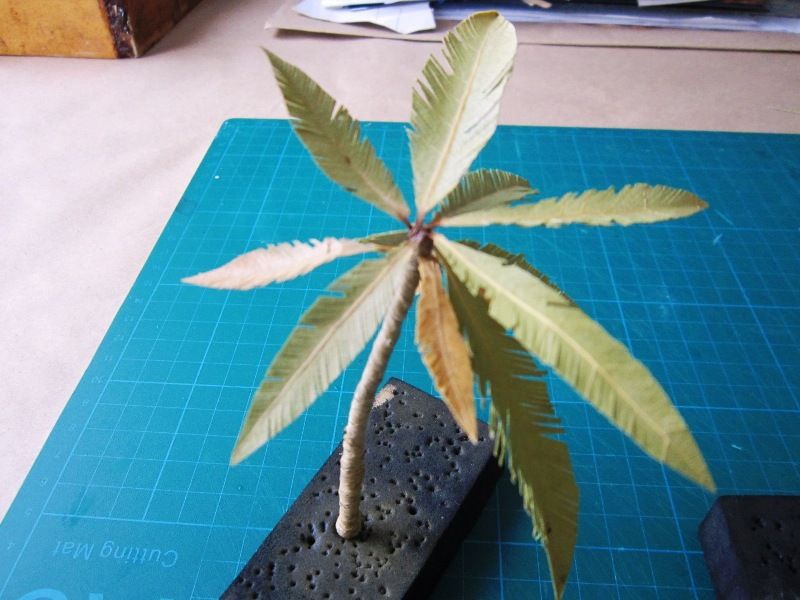
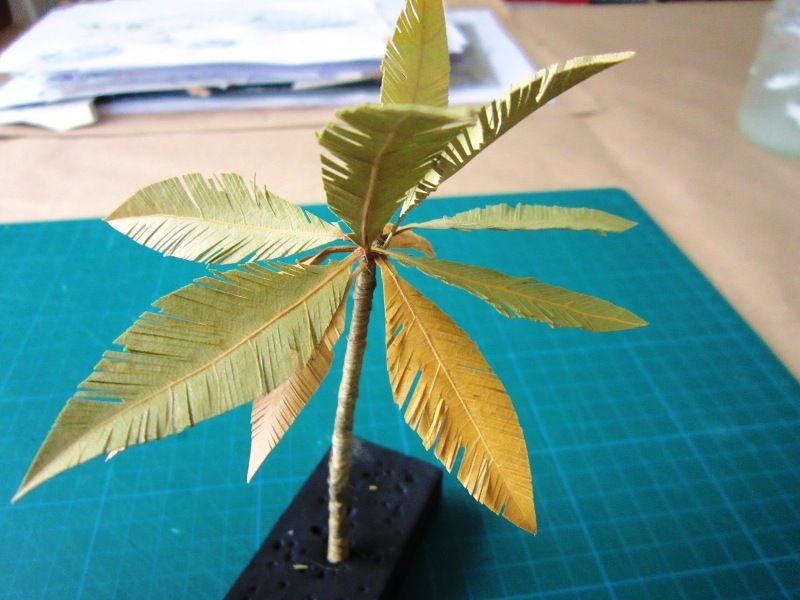
I first cut the painted paper into a rectangle the size of a leaf, then folded the rectangle in half and cut it into a leaf shape. Then I trimmed the ends with scissors


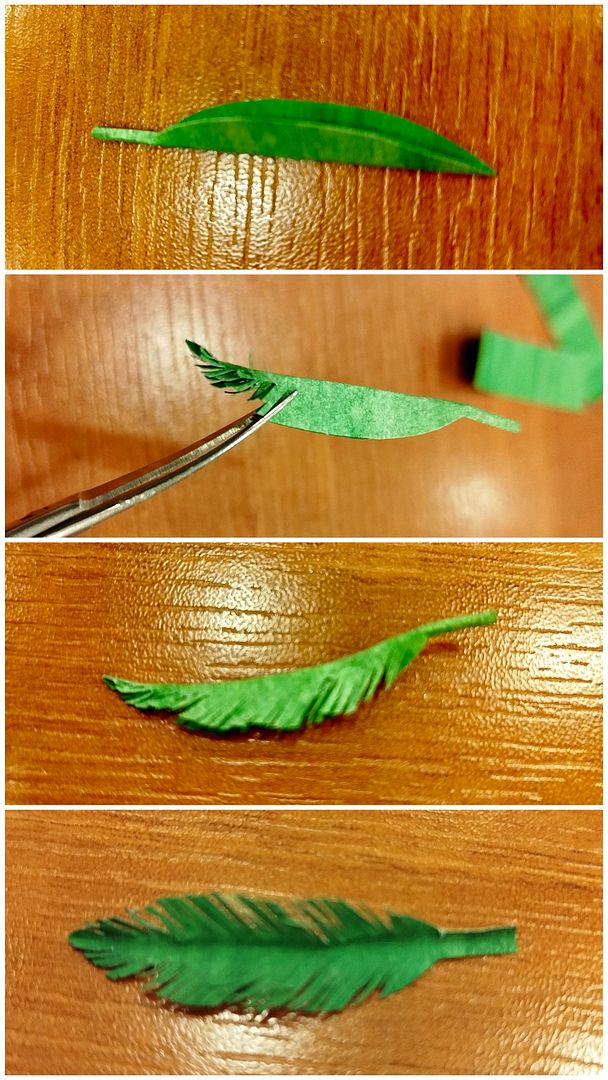
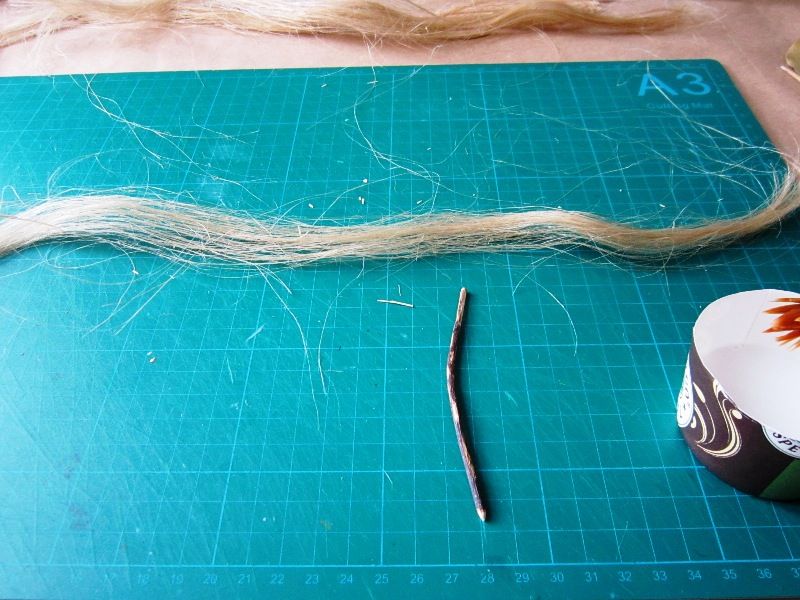
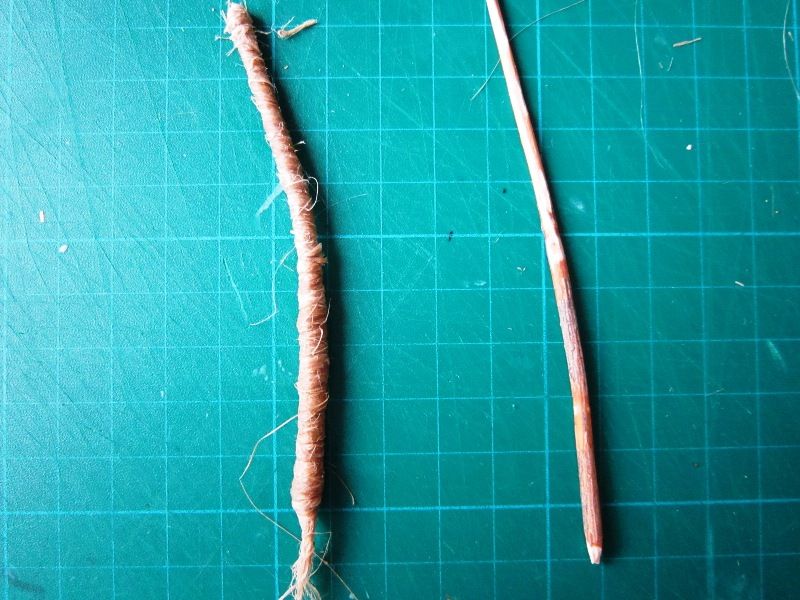
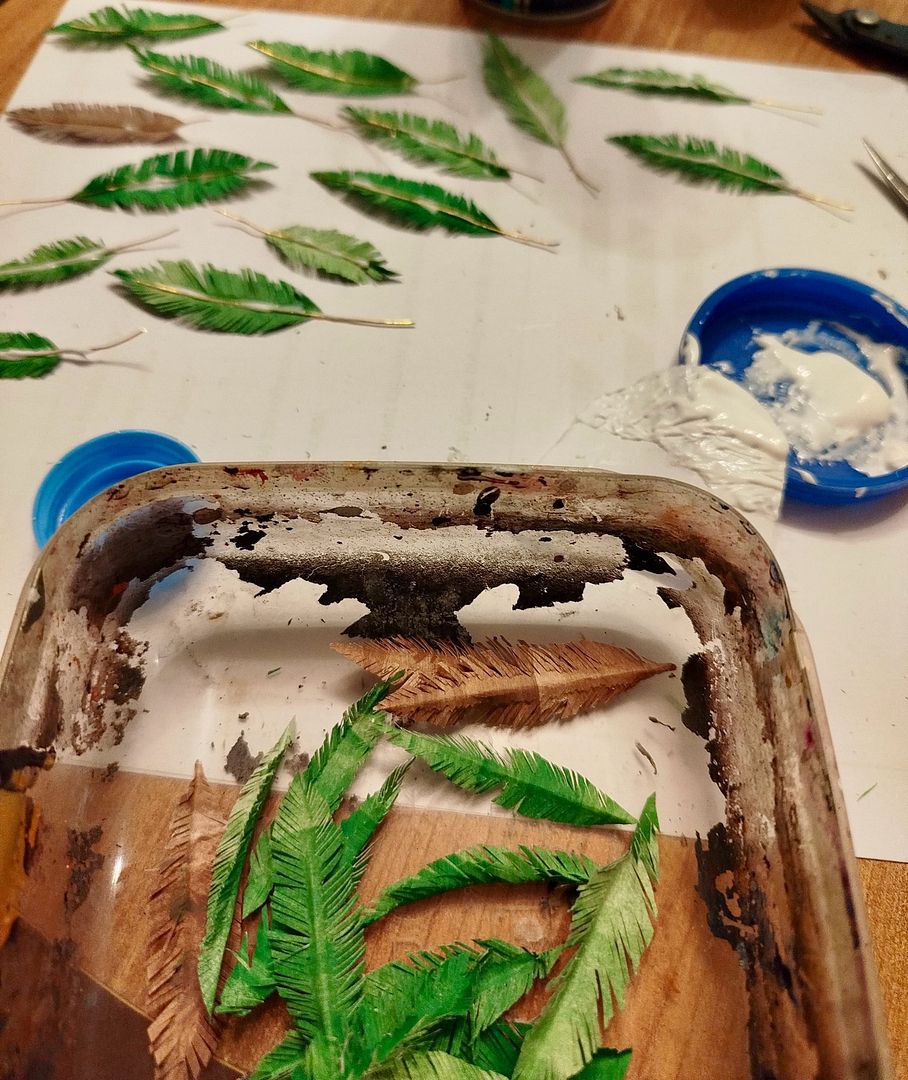
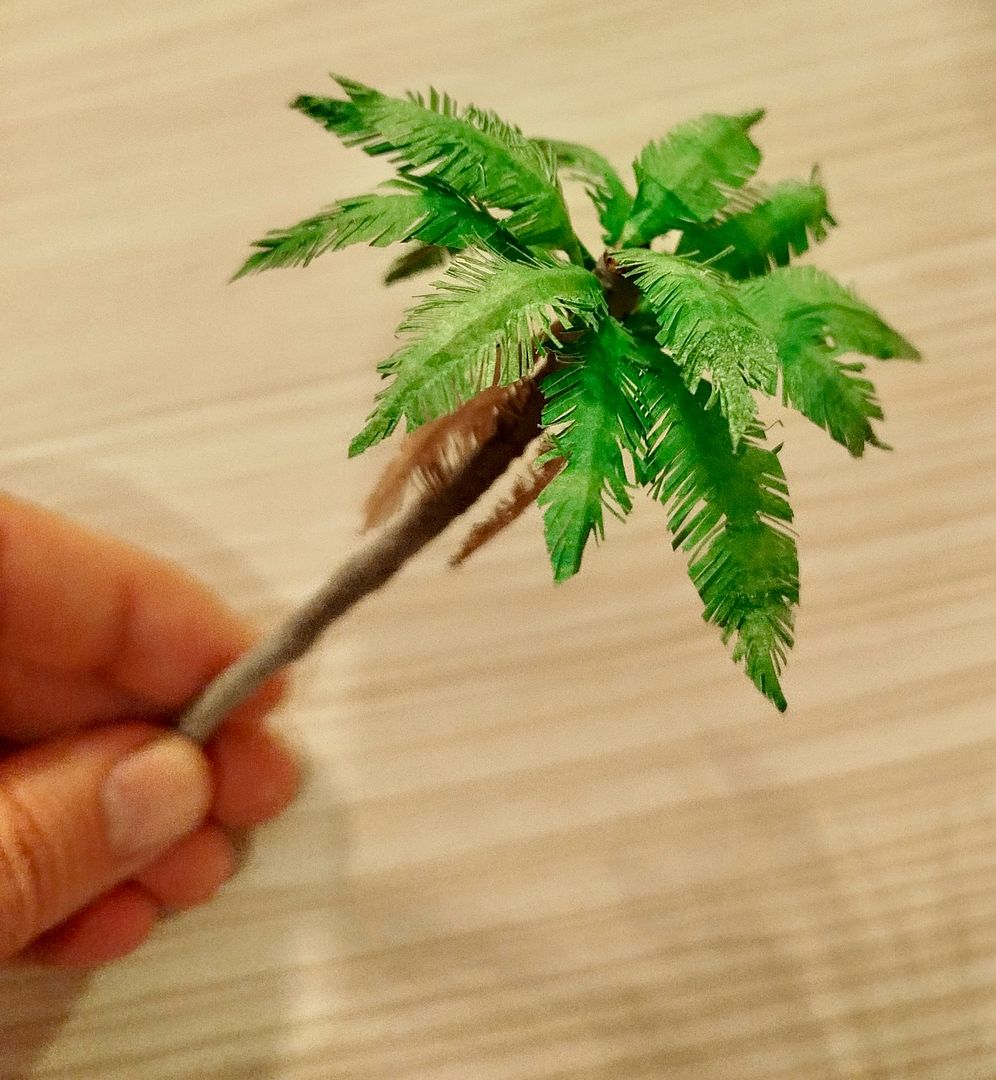
I glued wire to the middle of the leaves and then painted the wires in appropriate colors


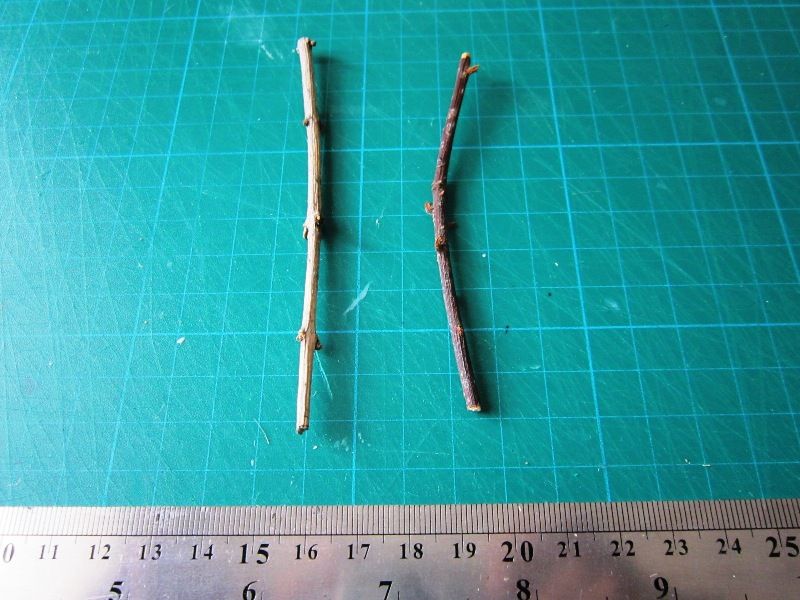
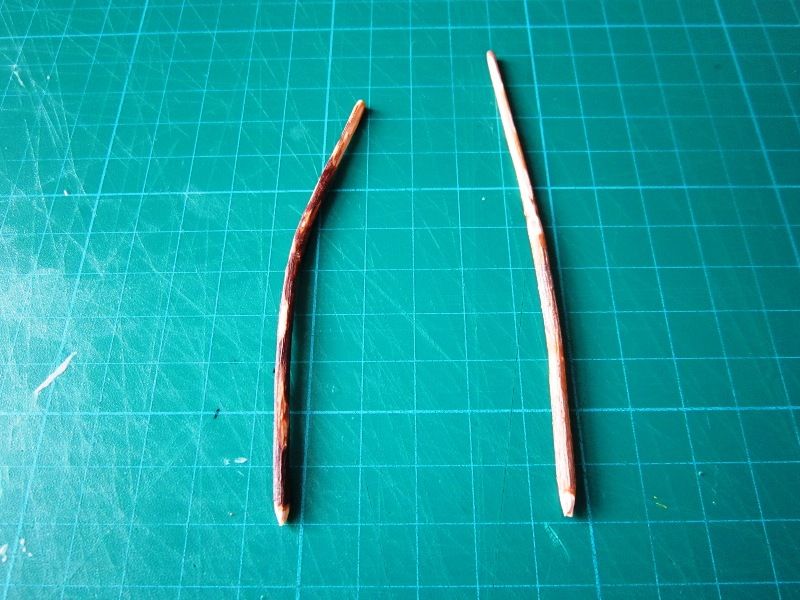
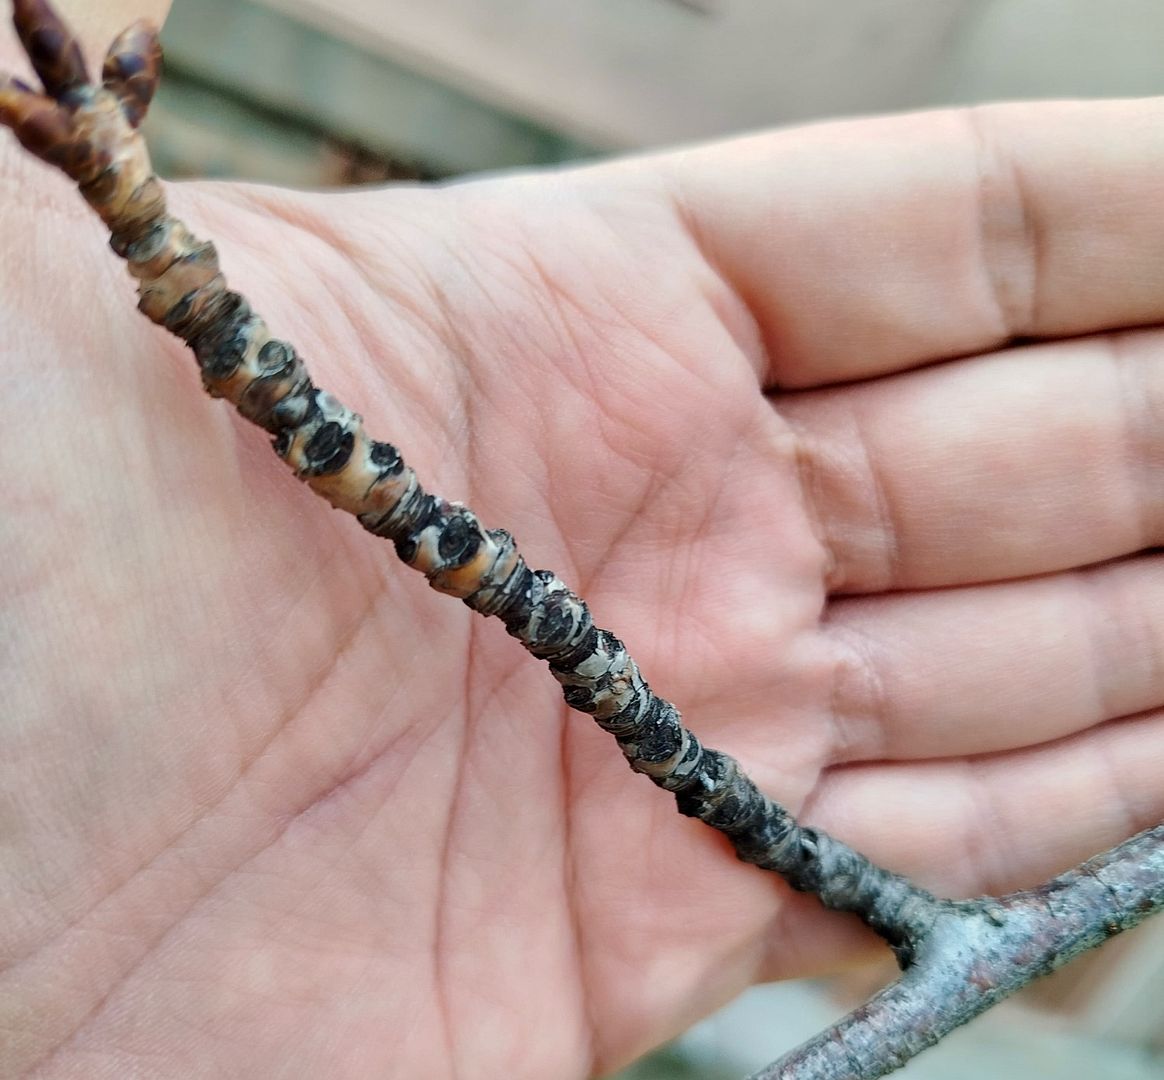
I painted real tree branches for the trunk. The surface of the pine branches gave a nice appearance for 1/72 scale.

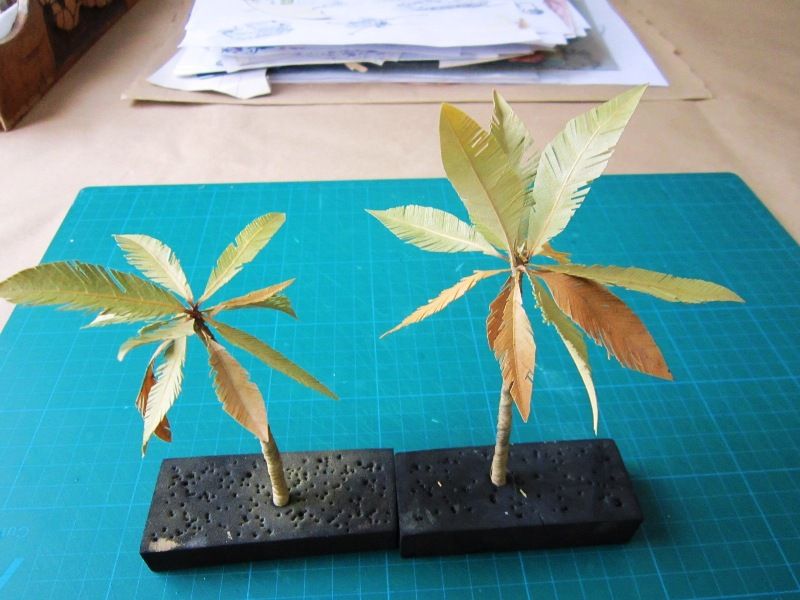
I shaped the leaves appropriately using wire and super glued them to the trunk.


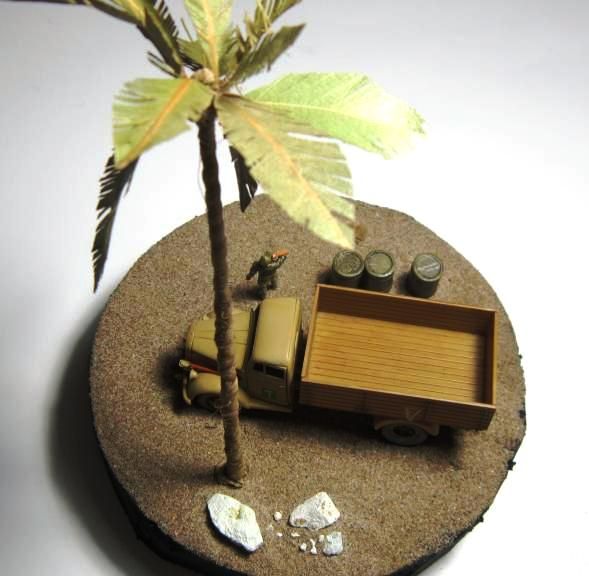
Not the best but looks nice...


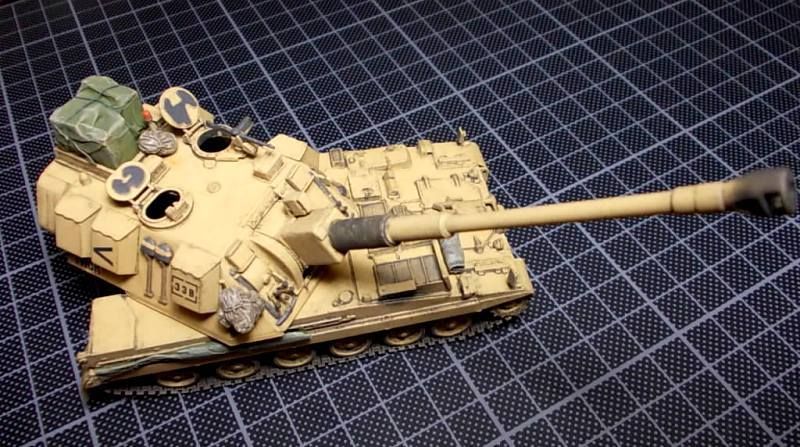
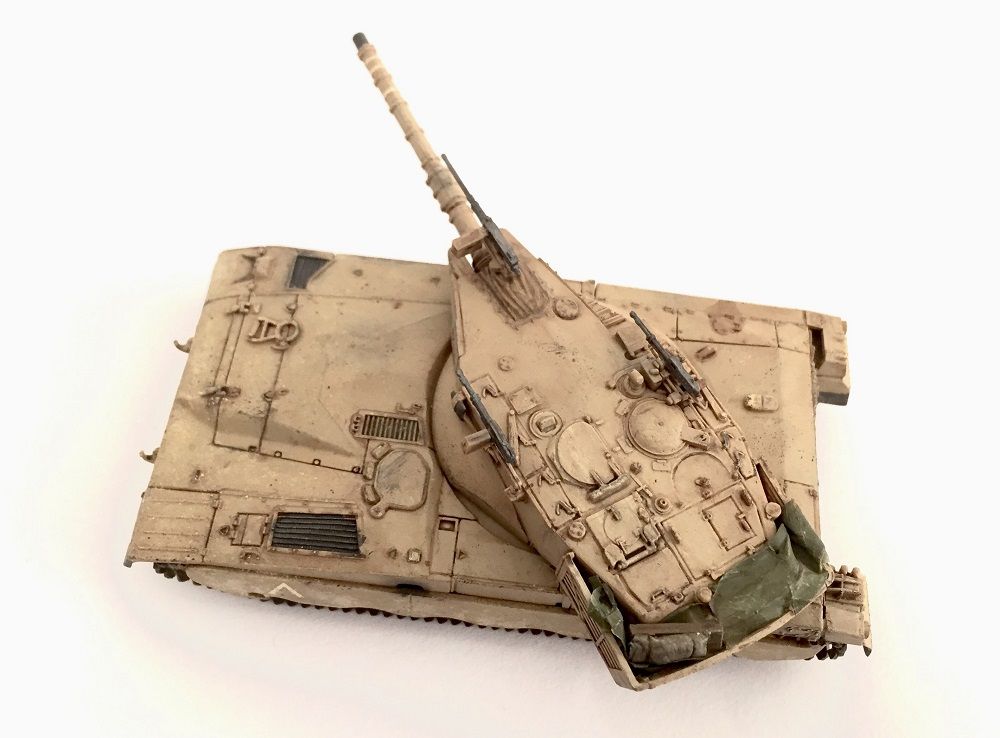
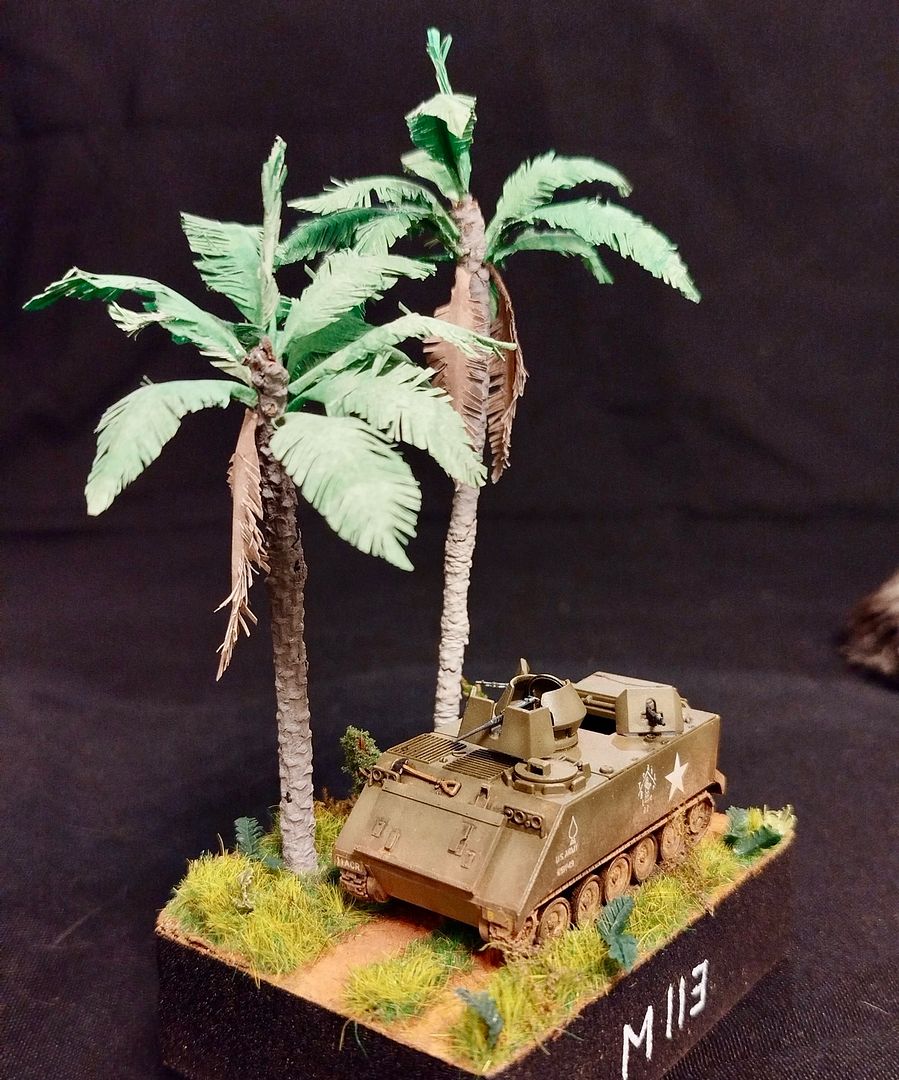
An example vignette with palm trees... Please wait for this vignette..


Thank for sharing Kerem...

Erhan... 

Thursday, February 25, 2021

How to make small scale tree (by Özgür Aydın)


Hello there,

Today Özgür Aydın is telling us about 1/72 scale tree making technique ..

Thanks my friend, 

Erhan ...


1. Bend the electric wire to make the body and branches of the tree. Try to make more thin branches towards upper branches.


2. 2. Cover the bended body and branches with putty, plaster or wood reparing paste. I used reparing paste. Cover the ben


3. Continue to this process until on the wires is covered.


4. As a last layer, make tree texture. To do this, make vertically strokes with your brush to on the not dried paste. Paste the small tree branches with t
ransparent glue to edges of branches of the your tree


5. Paint to the body and branches as you wish but this color should be suitable for a tree. I used a mixture of wood brown and black as base color. For highlight, I drybrushed with a mixture of wood brown and white.


6. Stick the turf to edge of the branch with hair spray. You can use a different glue, also. You can continue to the this process until you have to desired.


7-8. I used the hair spray again to paste little leaves. After the hair spray sprayed the on the branches, I sprinkled the different colored leaves.


9. I sprayed semi-gloss clear to everywhere and finished.

Happy Modelling,
Özgür Aydın

Friday, August 26, 2016

How to make tarpaulin, tent, canvas, blanket etc.. with "Parafilm".. (by Hakan & Erhan)


Hello dear friends,

My bro Hakan devepoled a new way to make tarpaulin/canvas for our model. We love this and we use parafilm now.
Erhan ...

What is parafilm?

A versatile, moisture-resistant, thermoplastic flexible plastic for a wide variety of clinical and industrial applications, Parafilm M® film has been used with confidence for years in scientific research and laboratory settings.

It is a proven fast, economical covering or stopper for test tubes, beakers, vials, petri dishes, flasks and various instruments and objects with irregular surfaces.

It is an ideal shelf or tray liner to prevent slipping of bottles or instruments. It is odorless and semi-transparent.

In laboratories, Parafilm M® sheet is a thermoplastic, self-sealing film that holds moisture loss to a minimum and offers excellent barrier protection to the contents of tubes, flasks, culture tubes, etc…


How to use for make tarpaulin, canvas etc..??

Parafilm is elastic material. We are thinning with pulling way


Than painting stage. We can paint various colour with airbrush


Here is the different colour tarpaulin. . Thanks Hakan for this  examples ...


This is an example of from me,   I made for the AS-90.


This winter camouflage, I did for the Type-90


The soldiers' coats (from Hakan Karlı)


Hakan had done the same camouflage ..


My Merkava I


Saturday, June 13, 2015

How to make small scale palm (by Levent İnceayan)


Hi all,
Today We will make 1/72  scale palm. Thank you for this article Levent.
Erhan..


Materials:
Find twigs from the garden
Water
White glue
linen used by the plumber
Scissors
Utility knife
Bay leaves
Paper cups.

 Firstly the twigs .. Height of 8-10 cm, thickness 2-3 mm.


Wrap the linen rope on twigs. linen to wrap solid need soak with white glue..


the leaves, Bay leaves should be dry. I've used the leaves have waited one year. Before beginning the cutting process,  waited a few minutes in the water for leaves more easily cut. And  cut bay leaves with scissors


Paste  leaves with glue  (I prefer CA)


The palm trees completed. No paint all in natural colors..


Merhabalar ,

1/72 yada 1/76 ölçekli palmiye yapabilmek için gerekli çalışmanın malzemeleri ve tekniklerini anlatmaya çalışırsam ,
Öncelikli olarak ;
Bahçeden bulabileceğimiz ölçeğe uygun dal parçası
Su
Beyaz tutkal
Eskiden musluk tamircilerinin kullandığı kendir ipi
Makas
Maket bıçağı
Defne ağacı yaprakları
Kağıt bardak.

Öncelikle dal parçasını ölçeğe uygun olarak ilk boyunu ayarlıyoruz yaklaşık 8 – 10 cm arası makul bir uzunluk çap olarak ise yaklaşık 2 – 3 mm kalınlığında olması idealdir .

Dal parçasının üstünde yaprak uzantıları var ise maket bıçağı ile o uzantıları keserek düz hale getirmemiz gerekmekte

Dal parçasının tam dik olması şart değil eğride olabilir , sonuçta doğal bir ağacı kopyalamaya çalışıyoruz ama unutmamak gerekir ki palmiye ve hurma ağaçları genellikle dik durmaktadır .

Uygun hale getirdiğimiz dal parçasının üzerine şerit halinde hazırlamış olduğumuz kendir ipini sarmamız gerekmekte , bunun en kolay yolu ise kendir ipini kesintisiz kopuksuz tam bir şerit haline getirip sulu tutkal ile ıslatmaktan geçmekte . Önceden hazırladığız bir kağıt bardağın içindeki tutkallı su ile ıslattığımız kendir şeridini gergin bir şekilde dal parçasına tam tur sardıktan sonra biraz daha gerçeklik katabilmek için alt kısımlara doğru yarı kısmı geçmemek kaydıyla tekrardan kendir şeridini sararak alt kısımları kalınlaştırmak daha iyi durur . Kuruması için biraz beklememiz gerekmekte .

Kurumaya yakın tekrardan ince tek bir kendir ipini gelişi güzel düzensiz ve aralıklı bir şekilde tekrardan dal parçasına sarmamız alttaki gayet düzenli duran kendir şeridini monotonluğu bozar ve gerçeklik kazandırır .

Dal parçasına sarmış olduğumuz kendir ipliklerinin fazlalık kısımlarını kuruduktan sonra çakmak ile yakarak temizleyebiliriz .

Yapraklar için ise ,
Yapmamız gereken öncelikli olarak Defne ağacı yapraklarını toplamız ve belli bir süre kurumasını ve şekillenmesini beklememiz gerekmekte .

Bu çalışmada kullandığım yapraklar bir yıl boyunca ağzı kapalı poşette beklemiş dal parçaları . Beklemiş yaprak kullanmamızın amacı bazılarının zaten sararmış olması ve diğerlerinin de kendi renklerine tam oturması .

Kesme işlemlerine başlamadan önce yaprakları birkaç dakika su doldurduğumuz kağıt bardağın içinde bekletmemiz kesmemizi kolaylaştırır .

Sararmış yaprakları ve yeşil yaprakları ortadaki yaprağın ana damarını baz alarak uygun ölçülerde kısaltıyoruz ve küçültüyoruz .

Yaprakların ortalama ölçüleri için insan figürü boyunu da baz alabiliriz yaklaşık olarak 2 – 3 – 4 cm olarak ayarlamak faydalı değişik ölçülerdeki yapraklar kullanmalıyız bu şekilde çeşitlilik ve gerçeklik kazandırırız .

Yaprakların sararmış olanlarını gerçekçilik açısından alt taraflara yapıştırmamız gerekmekte daha sonra üst kısımlara daha yeşil olan yaprakları Japon yapıştırıcısı ile sabitlememiz gerekmekte .

Az ama kaliteli yapıştırıcı kullanmamız gerekmekte , kendir ipi yapıştırıcıyı emmektedir fazla kullanmamız hiçbir şekilde fayda sağlamaz .

Yaprakları sabitlerken alttan gerekli desteği oluşturarak dik durmalarını sağlayabiliriz .

Ne kadar çok ve değişik boyuttaki yaprak iyi durur .

En son mat vernik ile sabitlenebilir .

Ben bu iki ağaçta hiç boya kullanmadım , doğal kendi halleri Doğa Anadan daha iyi renk elde edemem .

Herkese bol maketli günler kolay gelsin .
Levent İnceayan..


PS. Another example from Levent http://miniafv....opel-blitz-dak-somewhere-in.html
free counters