
Today a master modeler with us. Murat Özgül. Murat usually makes 1/35 scale model. This study is an exception. Moreover, from 2004.
Enjoy with an nice article please...
Erhan..
Hello,
German heavy tank Tiger I has always been a popular subject for World War II armour modellers. When they first appeared on the Eastern Front during the winter of 1942/1943, even though in small numbers, they proved to be valuable assets. Later on, they left their marks in every major German theatre of war.
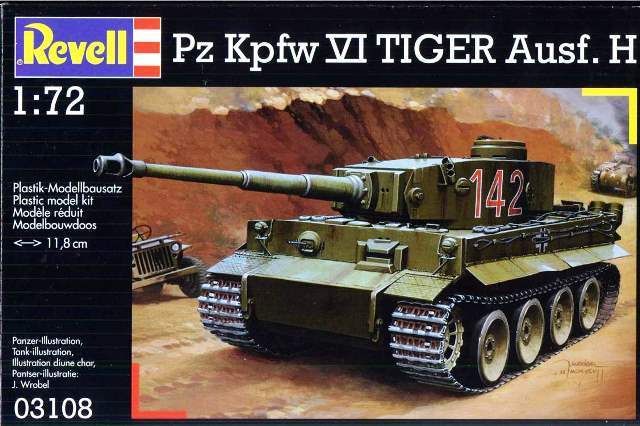
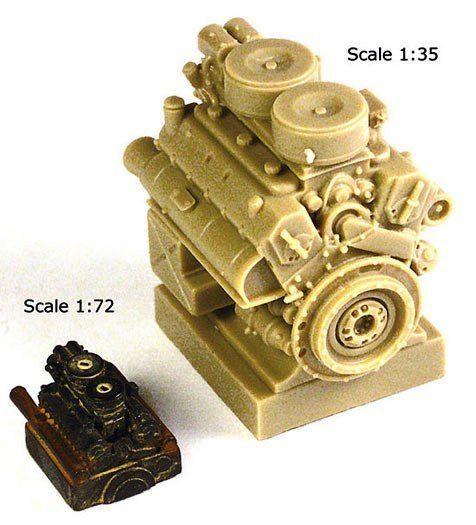
Eventhough many kits appear on the market, small scale is usually overlooked by the modellers as 1/35 scale dominates the armour modelling. In fact I do prefer building 1/35 kits but for a difference or for a more challenging work, I decided to build a Tiger I in small scale. I had bought Revell's Tiger I Ausf H some time ago and it was resting on my shelf. But after obtaining MIG Productions detail set, I decided to built this lovely little kit. The only problem was deciding the type.
After some research, I finally made my decision. The first Tigers that had appeared on the Eastern Front during the winter of 1942/1943 with the sPzAbt 502 were appealing subjects. These tanks were painted in German Gray and winter camouflage was applied on them. I had some good reference photos.
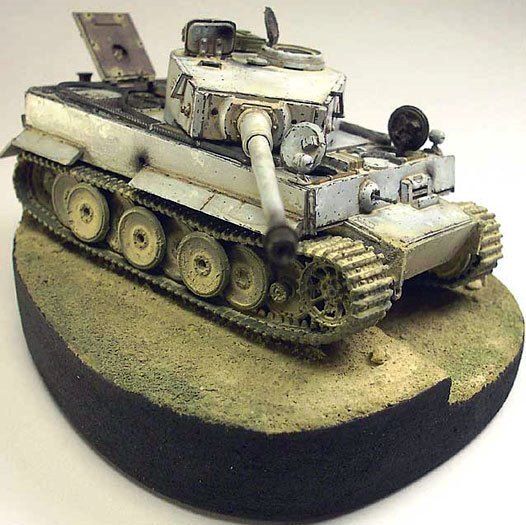
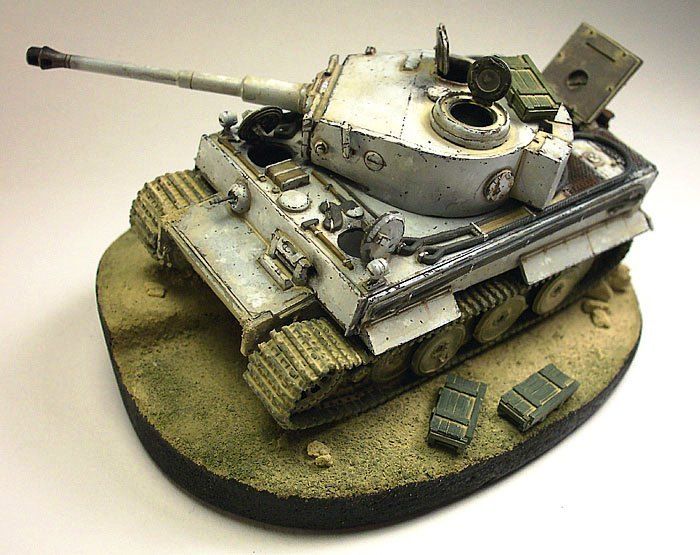
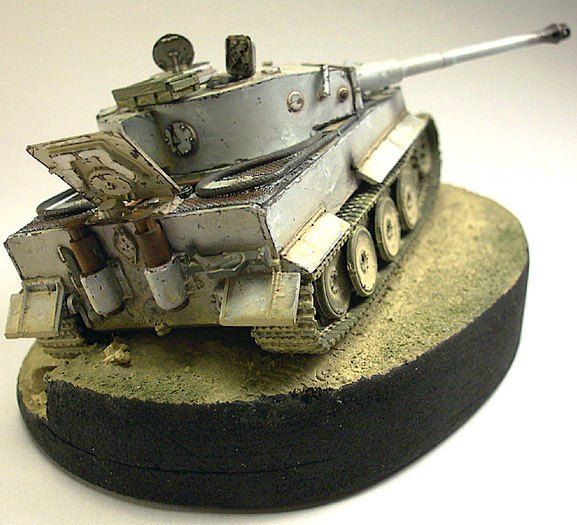
I preferred to create a small diorama rather than showing of the model alone, because I thought that a scene would give the model much more depth. However I took the idea of modelling an abandoned Tiger I from a photo taken in late 1944. It represented a Tiger I Ausf E with steel rimmed wheels. This photo was in Robert Michulec and Thomas Anderson's Panzerwaffe at War, on page 68.
What came out was my little diorama "Tiger I Ausf E (Early Version)". It represents one of the Tigers of the SpzAbt 502 left abandoned after a mechanical breakdown. This case was common as early Tigers suffered many mechanical problems.
The Kit(s)
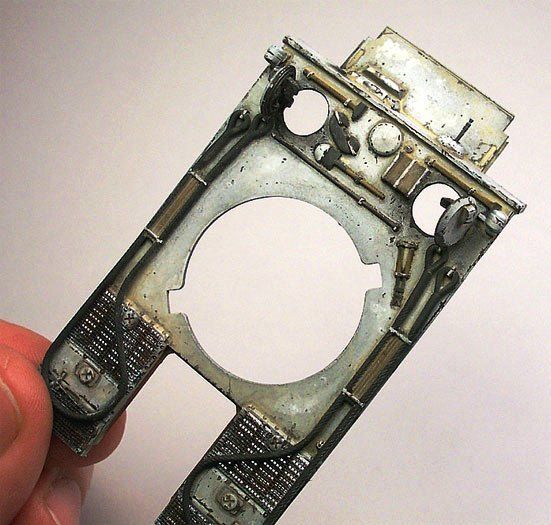
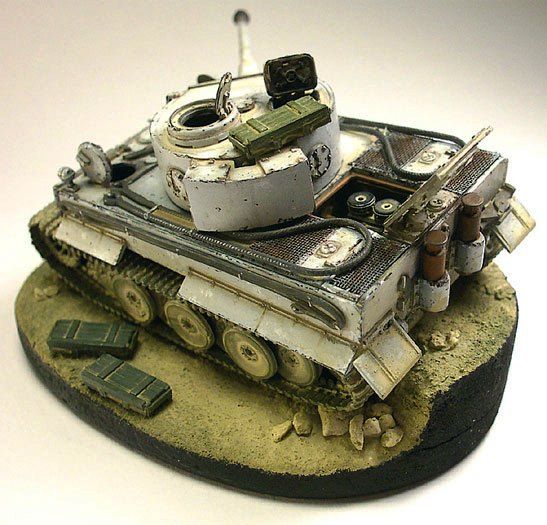
As mentioned before in an article in the Fine Scale Modeller, Revell's 1/72 Tiger I was produced in two versions and both of these versions had the correct scale dimensions. These two kits were highly detailed and even better than many of the other plastic and resin kits of the same subject. Both kits were molded from dark green plastic and were labelled as "early" and "late" versions. Mine was the Ausf. H - Ausf. E version is not available in Turkey in 1/72 scale and I was not willing to build the Africa Tiger. Instead, after some research, I have concluded that if I had removed the front mud guards and the exhaust filters, I could model a Tiger I E in winter camouflage that had seen action and had been abandoned. Surely, the engine cover which had already been open was attractive for detailing and luckily I had such a set from the MIG productions which was already designed for this kit.
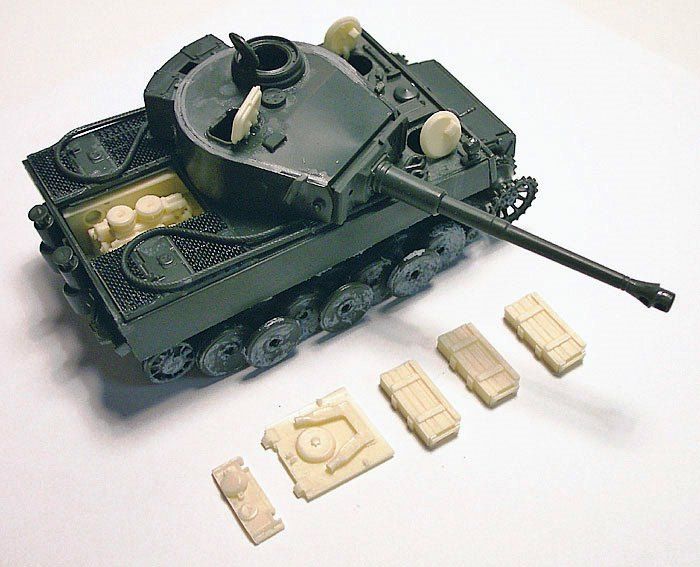
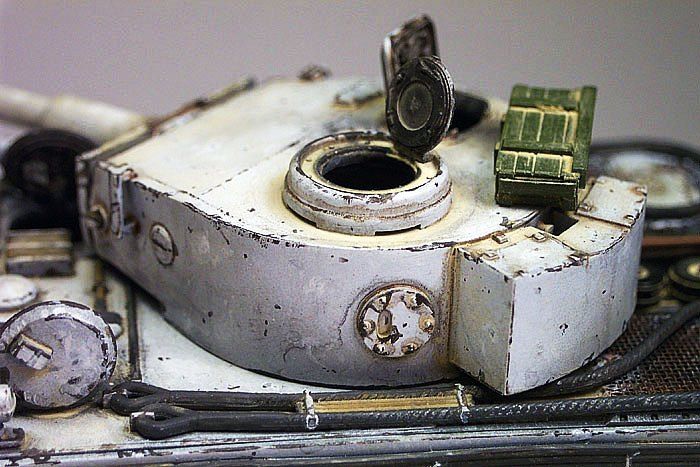
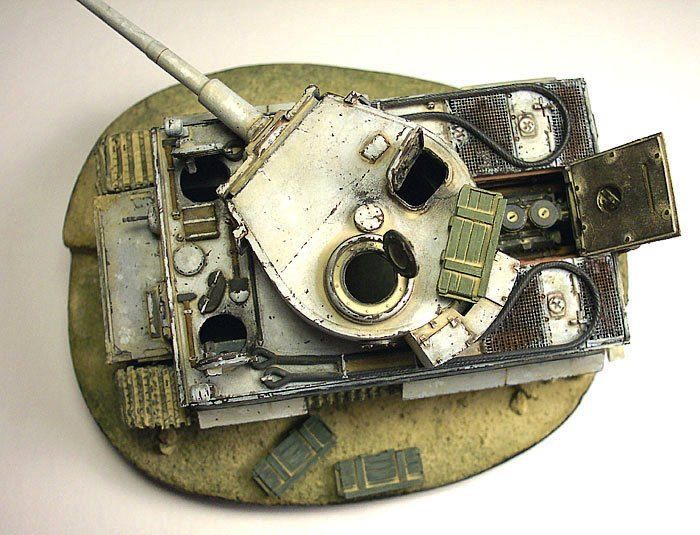
The detail set from the MIG productions, which consists of resin parts, is highly detailed. It should be mentioned here that it is also very practical and easily applied. It consists of three crew hatches (including two periscopes), two engine covers (one for early and one for late versions), an engine and an engine deck. The parts break down from the sprue without any problems. As can be seen from the finished model, the engine and the engine deck is the focus of the MIG productions' kit and is already been molded to fit Revel's kit, so you don't need to work on cutting the engine cover. The kit has engine covers for both of the Revel Tigers. The only thing that is left to be done is to cut open the crew hatches and that was the only work which was problematic somehow.
Both Revel's and MIG productions' kits fit each other perfectly; they are highly detailed and are easily built in to one perfect model, even in such a small scale. However cutting open the crew hatches need extreme care. I think that if Revel used some kind of harder plastic, this process should have been rather easier. Anyway, these kinds of matters make modelling more challenging, doesn't it?
Painting and Weathering
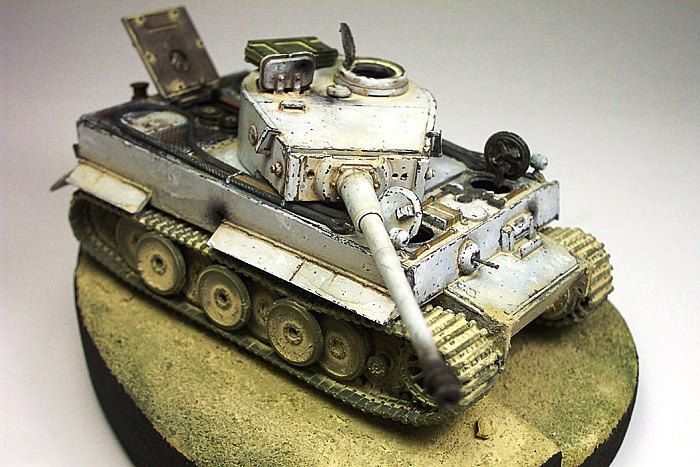
The Body and the Turret: I don't have the habit of using a premier before painting a model. Instead for early German Armour, I use Tamiya XF-63 German Gray as the base, as it covers the surface pretty good. I usually mix 15 to 20 percent X-22 Clear to XF-63. The only thing to care about the paint is that you have to thin it properly before applying with the airbrush so it can hold on the kit. For my Tiger, as the scale is so small to show of as much detail as in 1/35, I airbrushed several coats of thinned German Gray. The good thing about thinned paint is that it does not cover the details.
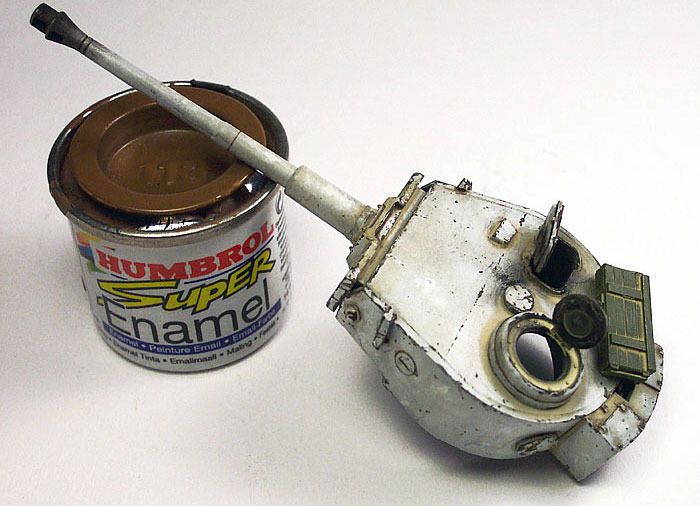
My next step is the applying the winter camouflage. For this purpose I mix Tamiya XF-2 Flat White with X-22 Clear. After thinning the paint, I airbrush the colour on the kit with low pressure in such a way that the undercoat is visible on spots. My purpose is to show the carelessness of the crews that apply the winter camouflage. As the references indicates, in most cases and in almost every army, winter camouflages were crudely and hurriedly applied. The purpose is making your vehicle ready for combat and to blend in the snow as soon as possible. Applying the winter camouflage is the final step of general painting of my model. The care you give and the decisions you make in this process greatly influences the finish of your work.
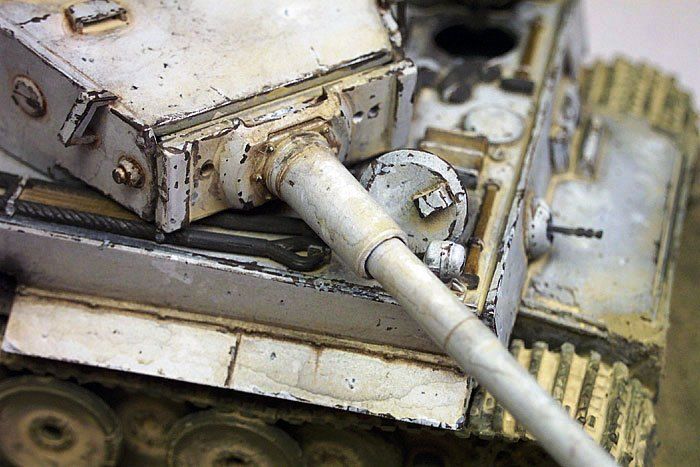
After finishing the general painting process, you have a raw tank to work on. Fist of all, I apply a semi-gloss wash with the proper colours that I choose for washing. But I must say that my “washing” process is a bit different . I mean I don't follow the path of “brush the oil colour and remove it with a cloth so the details and higher points would remain lighter when the edges get darker”. I believe using that method can make you loose control over the wash easily. I guess to obtain a more realistic look, weathering every part in different amounts gives a more realistic appearance to your model. War time photographs are good references and are really helpful in this stage.
Now details of my washing process: Firstly, I mix Burnt Sienna with a small amount of Raw Umber and thin this mixture with turpentine to an extent that the mixture can flow on the surface. Than I darken the places that I choose. As the thin paint works slow, this process can be repeated many times as you want. When the proper shade appears, I stop applying the wash. I only darken the places that I choose, not the whole model. So washing process should differ according to the modeller, I guess.
After the washing process is over, I start chipping the paint. Firstly, I prepared a dark gray mixture of enamel paint. I use Humbrol enamels. I paint certain spots with this enamel mixture wit a brush to give the chipped paint effect. I think there is not a single way for chipped paint and this can vary from person to person but I can suggest that enamel paint works best for chipping because it dries quickly and if you are not satisfied, you can wipe it of quickly. However as I mentioned before there is no certain method and I believe this matter is all about the modeller's painting ability but most of all a good research on the subject vehicle and real photos greatly helps the modeller a lot. Seeing is better than knowing.
When all the job is done, one final stage has to be approached. For me, this final stage is most enjoying, perhaps it is because that my model is very near to end. This final stage is “acrylic wash”. I use acrylic paint for weathering. Just mix earth colours with water, but be sure not to loose control. Than apply the mixture on the model from lighter to darker shades. On my Tiger, I used Tamiya XF-57 Buff. When the water evaporates, the colour fills the shades and details the model.
Road Wheels and Tracks:
Before applying any paint, I brushed some putty on the wheels with a flat end brush. This process brings out a muddy look on the wheels. I paint the wheels and the tracks with the same colour: Tamiya XF-49 Khaki. Than I applied the “acrylic wash” with XF-57 Buff.
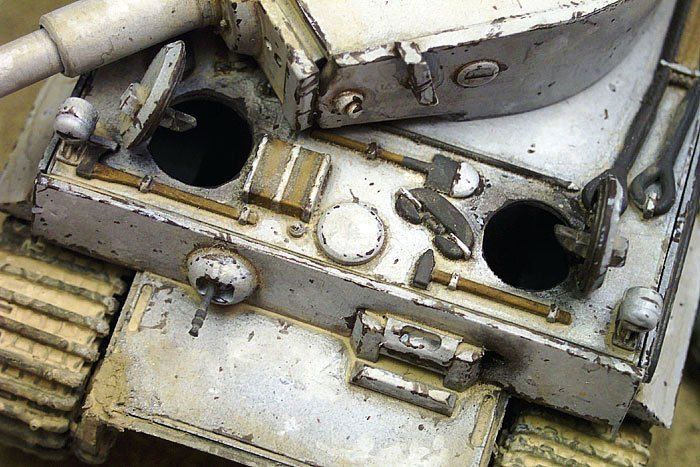
Engine Deck and Engine:
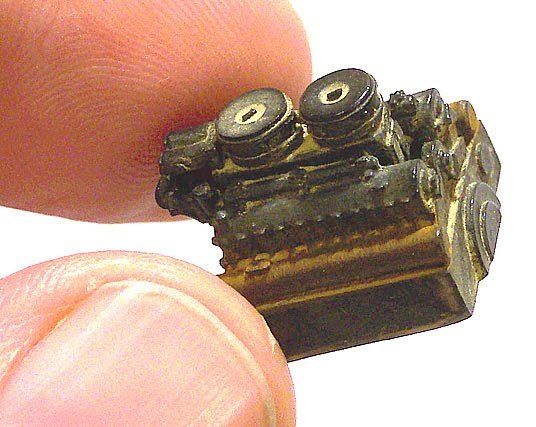
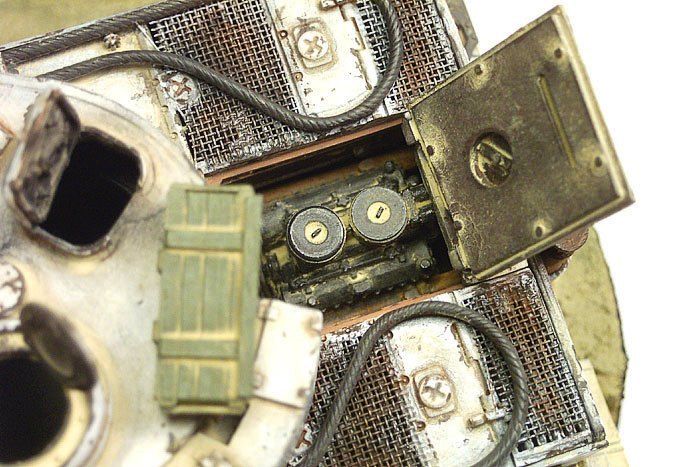
Eventhough when building the model, I thought that the engine and the engine deck was the heart of the model, but to my surprise painting these parts was rather easy than the whole model. Before the assembly, I painted the engine with semi gloss black and I applied Humbrol Matt Rust on the exhaust pipes. Well, enamels dry in rather longer times than acrylics for sure but I had the time. Only when the paint is dry, I again applied acrylic wash on the parts. You can see the consequences on the photos. I found them really satisfying.I have to mention here that I am not fond of dry-brushing. I believe too much dry-brushing takes away the realistic look of the model. I don't use this technique in any of my models.
I painted the engine deck with Tamiya XF 9 Hull Red and I acrylic washed it. To give a more realistic rust effect, I used MIG Productions pigment P025 Standard Rust in certain places and in small amounts. After all is done, engine and engine deck was ready for the assembly.
Round Crates:
Painting the crates are rather easy too. The only thing you have to do is applying several coats of Tamiya XF 61 Dark Green. I preferred to paint the crates in different tones and shades. After the paint is dry, again “acrylic washing”.
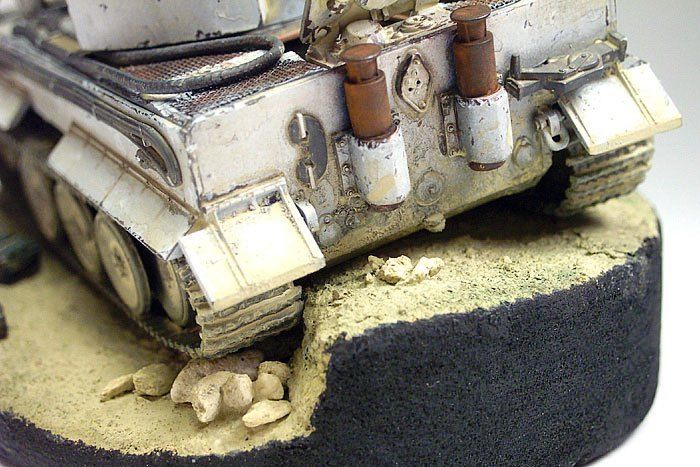
The Base
Finally, what I needed to give depth to such a small model was a base. As I mentioned before I planned to built an abandoned Tiger at the Eastern Front. This was the theme that brought out my little diorama. I don't intend to mention the building of the base in length here, as it would be a subject of another article.
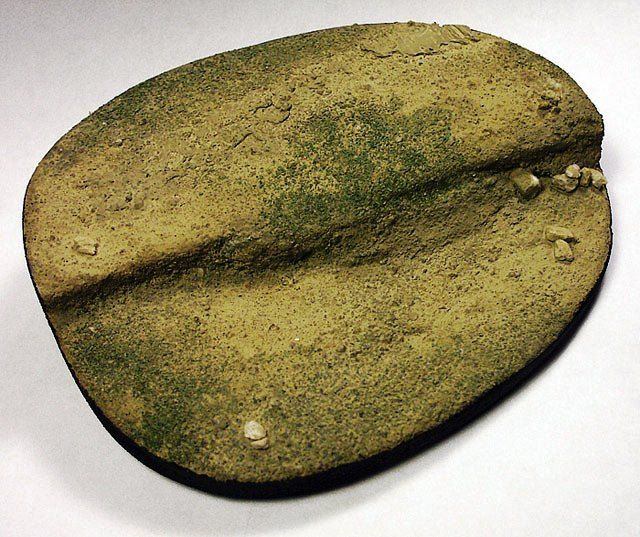
Breifly, I bought a polyurethane from a local construction market. I believe this material is sold in every country but in different names. Its size was 50 to 70 cm but I cut away the part that I would use for the base. You can use any material you like for the base but be sure that it could be carved to shape. I sanded the sides to soften the shape. After shaping the base, I applied white glue which was diluted with water and scattered ordinary earth on it. I repeated the process a few more times until the base looked like what I wanted. When the earth dried I applied Tamiya XF-57 Buff on it and than I applied some static grass. I airbrushed the grass with Tamiya XF-65 Field Gray. I also placed some small stones here and there. Finally again acrylic washing with Tamiya XF-57 Buff.
After all is done, one thing was left to do: Placing this diorama in the shelf near the others. Oh also taking photos and sharing with fellow modellers.
Kit: Revell Tiger I Ausf H 1/72 (Revell 03108)
Engine and Detail Set: MIG Productions (MP 72 045)
Crates: MIG Productions (MP 72 066)
Base: Home made from Polyurethane, earth and static grass
Murat Özgül...

Bruce Culver,Tiger in Action, Squadron /Signal Publications
Willy Peeters and Alain Hanel, Armor in Detail: Tiger I Ausf E, Verlinden Publications
Robert Michulec and Thomas Anderson, Panzerwaffe at War 2, Concord Publications
Horst Scheibert, German Battletanks in Color, Schiffer Publishing
© May 31, 2004 by Murat Ozgul.

Bravo !! Thumbs up !!
ReplyDeleteBest Regards,
Julio
Brilliant
ReplyDeleteOh gosh!
ReplyDelete:)
On the other hand,
always to be able to know that here there is only the quality work ...
Great work and Nice details.
ReplyDeleteVery nice work !
ReplyDeleteNice weathering but for a winter scenery...and hatches interiors should be offwhite.
ReplyDeleteAnd the tank is ON the sand ?